The old saw that the happiest day in a sailor’s life is the one on which they sell their boat is funny, of course, because of the fact that owning a boat can be both expensive and a lot of work. If you sail a boat hard, and especially if you’re in the habit of making ocean crossings, taking care of the rigging, sails, systems, engine and, of course, the hull and deck is not only crucial but ongoing. Let’s look at one of the most insidious maintenance issues: leaks.
Nothing eats away at a crew’s morale like a leaking boat, whether the water is coming in from overhead or below the waterline. Over time, there’s also nothing like leaks for eating away at a boat, too. As long as those leaks keep leaking, you’ve got a damp boat, which will turn into a rotten boat if you don’t do something.
Traditional wooden boats are, of course, at a greater risk than more modern vessels made out of fiberglass. But that doesn’t mean the latter can’t still have problems. Cored GRP boats, in particular, are notorious for losing structural integrity in their decks when leaks around fittings aren’t repaired. Similarly, metal boats can corrode, while cold-molded wooden boats constructed of wood veneers saturated in epoxy, like our 40ft Francis Kinney designed cutter Celeste, can rot out as well. The good news is that kept in good condition, Celeste is as comfortably dry as any other boat out there. However, keeping her that way means either not sailing her very hard—something my husband, Seth, and I are unwilling to do, since sailing across oceans is why we bought her in the first place—or being sure to re-bed her various fittings if and when they start leaking.
Sailed hard enough for long enough, all boats will flex in the highly dynamic environment of the open ocean. There is the force of the waves, for example, which is ever-changing. Sometimes you might be surging along with the swells. Other times you may find yourself punching into them. Still, other times the boat might have a corkscrewing motion as two different sets of swells come in from different directions, meeting to form confused, pyramid-like waves. There is also the constant pressure of the rigging, with the forces of the forestay and backstay effectively trying to fold the hull in half. Given all these constantly changing and often extreme pressures, it’s a wonder the seams and joints of all boats don’t leak all the time!
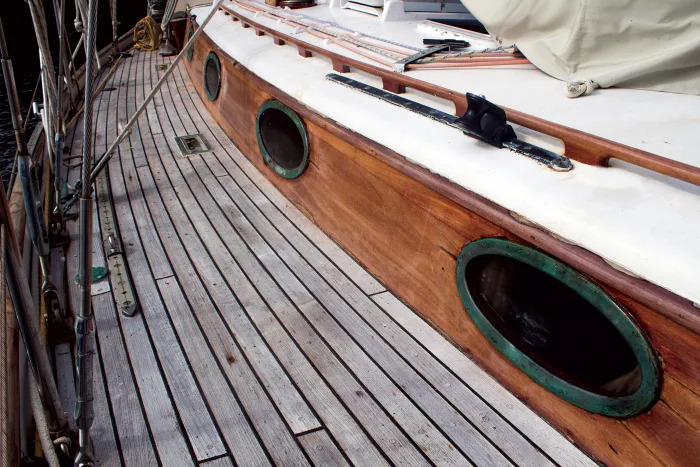
When Seth and I bought Celeste, we were astonished—and grateful—to discover how dry she was, and we continued to be astonished as she remained watertight over the course of five years exploring in the cool and rainy climate of Alaska. It was not until we sailed to the hot, arid climate of Mexico’s Sea of Cortez that problems started. Thanks to the fact Celeste is built of cold-molded wood, she did not develop any leaks in her hull or decking. However, the heat did begin to shrink the material around her various fittings: including her bronze portlights, the frame holding the center hatch, the deck prisms, the foot switch for the anchor windlass, the stanchion bases and the bow pulpit.
At first, we didn’t know we had a problem, and it’s really more a guess than anything else that the desert climate of Baja is what started it all since it would take another two and a half years in French Polynesia before any of Celeste’s incipient leaks became truly noticeable. Even then, none of the leaks that we had were much of a problem as we limited our sailing to a number of shorter passages around the islands. Then came the passage back home to Hawaii, during which it only took a few short days to realize just how bad things had become.
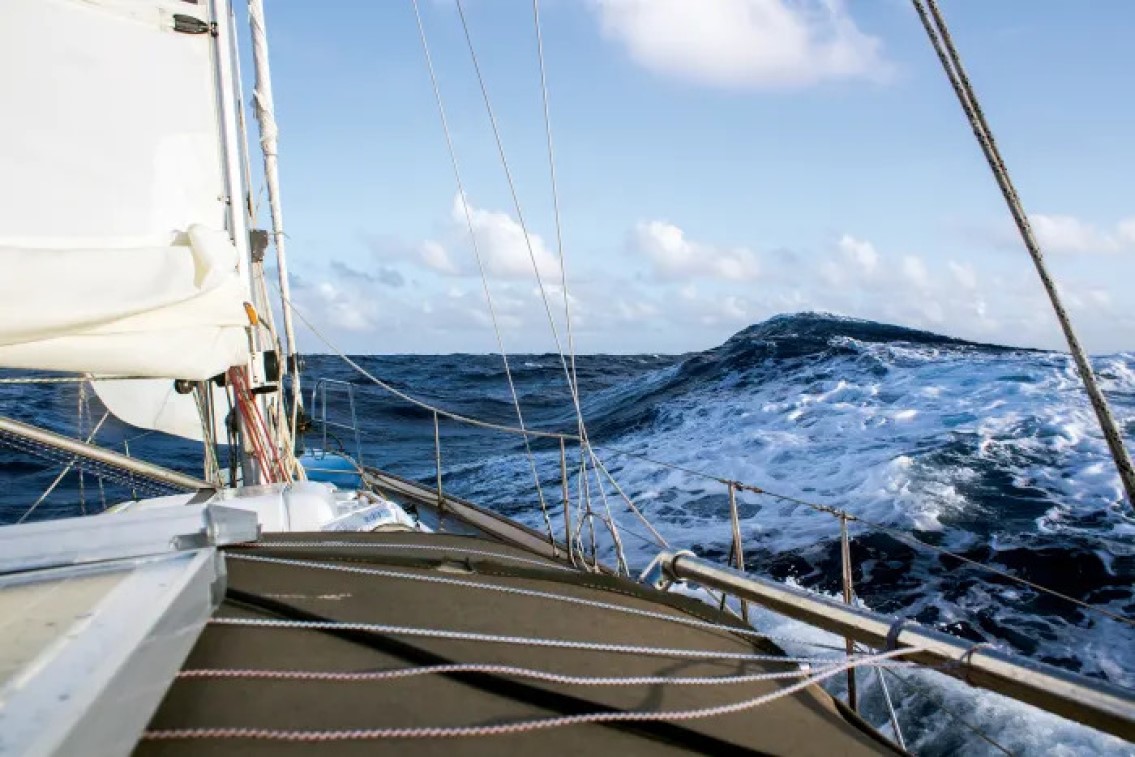
The trip consisted almost entirely of strong headwinds and steep seas, which caused a lot of flexing and strain on Celeste (see Close-hauled to Hawaii, SAIL September 2021). This in turn caused the boat’s many leaks to quickly became not only noticeable but quite unpleasant, prompting us to set straight to work trying to trace their origins. The source of the leak over the leeward bunk—the ideal leak for killing on-board happiness—quickly proved to be the deck prism. The water trickling from around the portlights was pretty obvious as well. The water dribbling along overhead remained a mystery until we finally traced it back to the center hatch frame. Try as we might, we were unable to accurately trace the many leaks originating from around a number of stanchions, the bow pulpit and windlass switch until after our arrival in Hawaii.
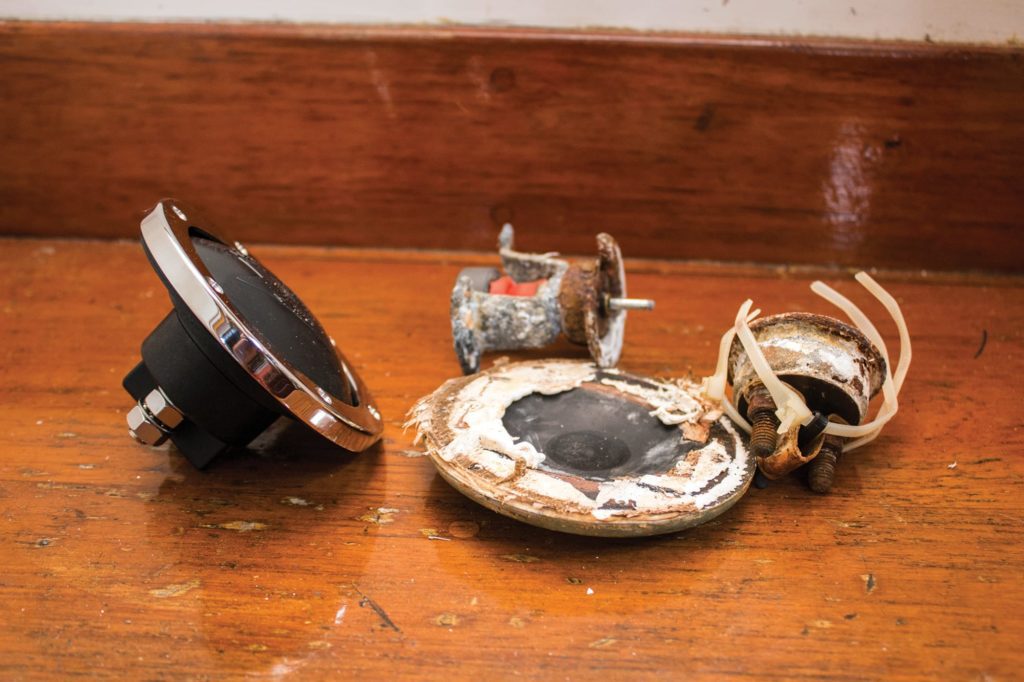
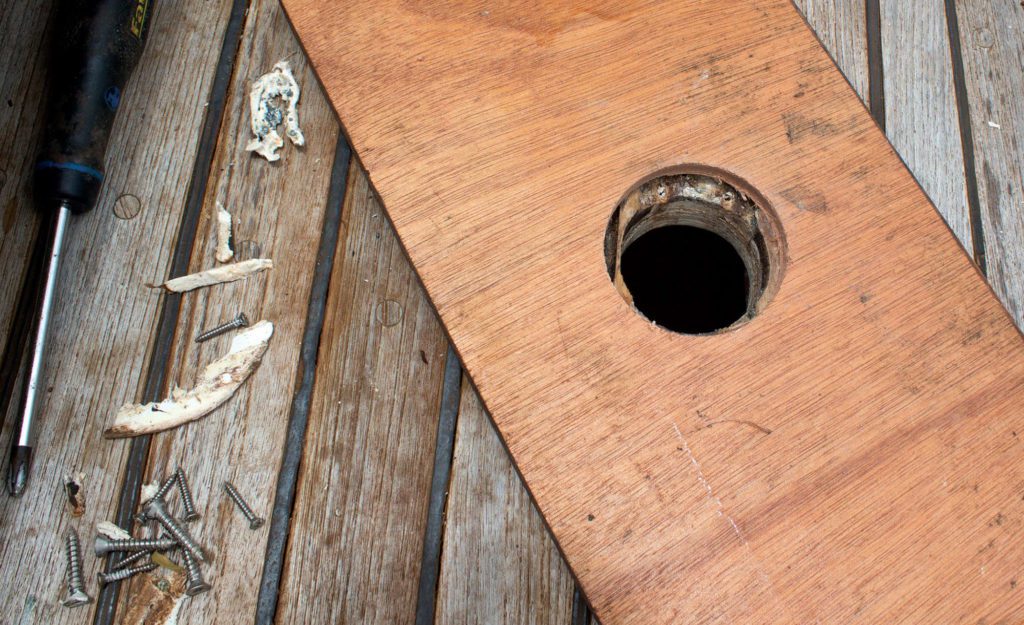
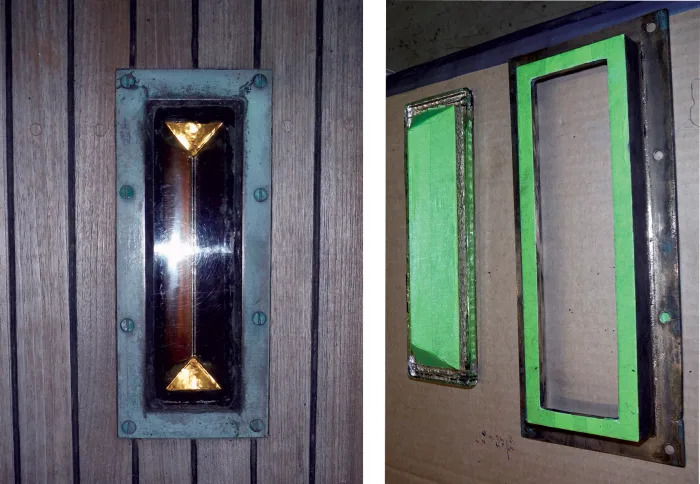
No big surprise, upon our arrival home tackling the many leaks we’d discovered was our top priority, and first on the list were those deck prisms. They had apparently last been bedded with 3M 5200, an extremely strong adhesive sealant that’s supposed to be permanent. This in turn makes it very difficult to remove anything it has been used to attach, to the point where when we pried out the prisms and their bronze frames, some of the teak and marine plywood of the surrounding deck came along with them. Given this experience, in our opinion 5200 is best used only when strength is your primary concern. If flexibility and a watertight seal for when the boat is flexing at sea is more of a priority than strength, better to go with something else.


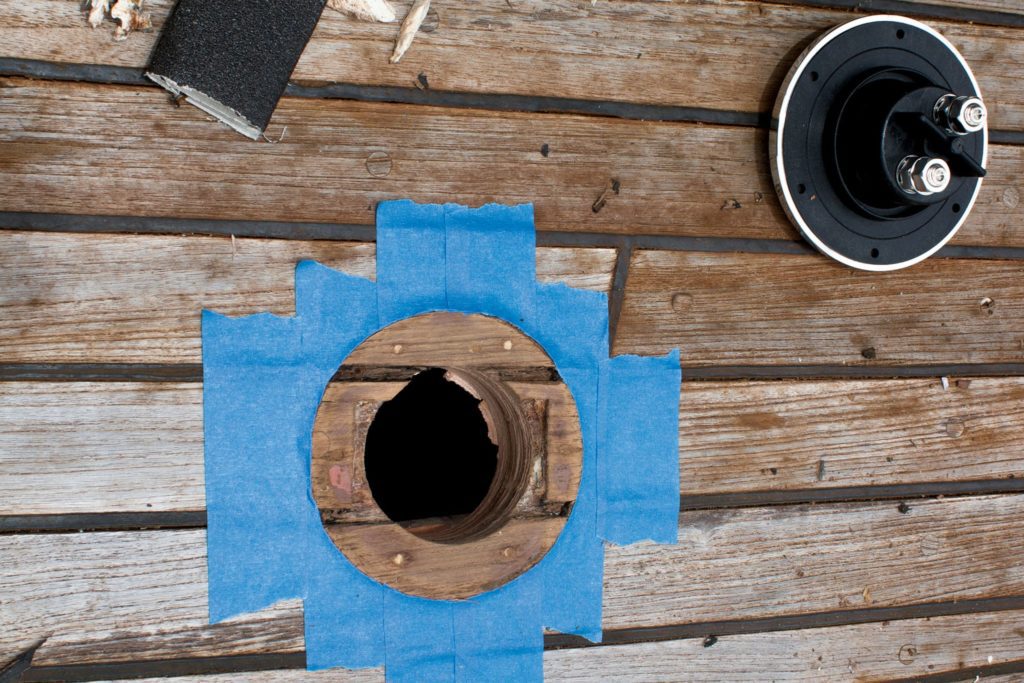
Of course, strength in the sealant was not a big concern with the deck prisms: that’s provided mostly by the screws holding the frame. We, therefore, re-bedded the prisms with a combination of marine silicone and polyurethane sealant from Boat Life called LifeSeal. As a first step, we repaired the bits of the deck that had been damaged by the 5200 with West System epoxy and low-density filler. While waiting for it to cure, and before we could sand it smooth, we also scraped, scrubbed and sanded off all the old sealant from the prisms and frames. As a final step, we taped the prism and deck with painter’s tape, cleaned the surfaces with solvent and then used plenty of sealant to make sure both the joint and the screws would be watertight.
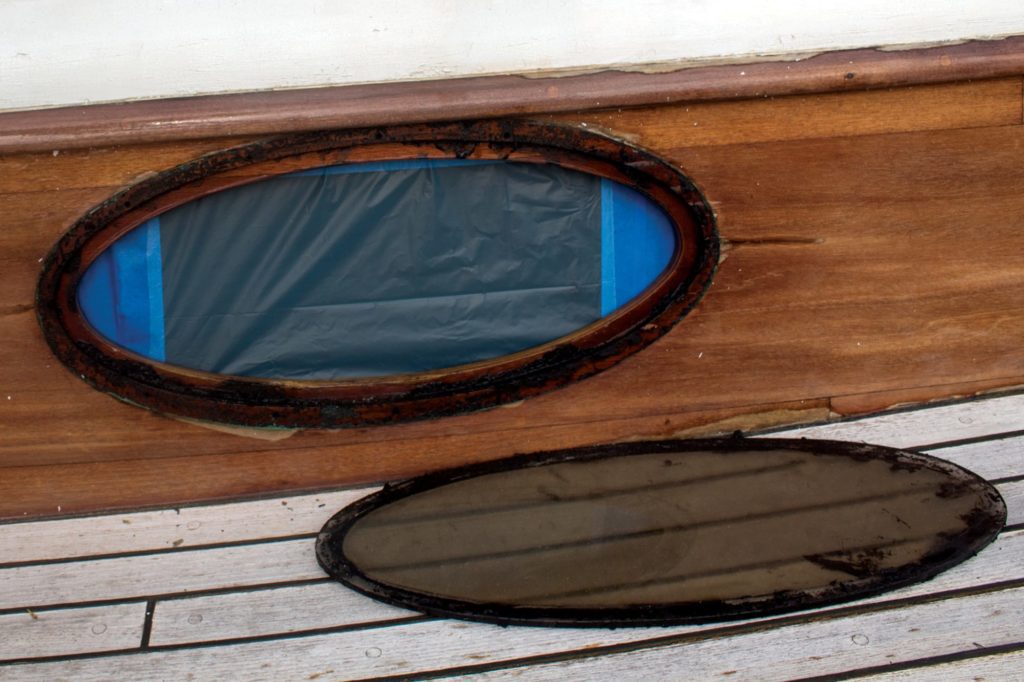
With the deck's prism taken care of, it was time to move on to the portlights, which had been bedded with an unknown but old and very sticky sealant. I doubt it was 5200 because they were so easy to remove. Once we’d taken out the screws, it just took a knife blade inserted in between the wood and the bronze to remove the bronze frames. No wood came away from the cabin. By contrast, removing the sealant from the bronze frames, the Lexan ports and the mahogany cabin was one of the toughest parts of the entire project. It took hours of elbow grease since neither turpentine nor acetone (which we only tried on the bronze) would defeat it.
As is the case with so many boat projects, prepping surfaces is the key to any good re-bedding job. If you don’t get all surfaces perfectly clean and ready, you are almost guaranteed to develop another leak. Once we’d cleaned up the frames, ports and cabin, we tackled a spot where the wood had started to rot away, sanding it back until we got to solid wood and then building it back up again with some more West System epoxy and low-density filler. Had the rotted area been any larger, we would have scarfed in a new piece of wood. Our cabin-sides, like the rest of the boat, are made of laminate, which means they don’t rot easily, and the rot takes a while to spread in the event it ever gets started. It also means using epoxy on them is perfectly acceptable.
Before putting the ports back in, we prepped everything with mineral spirits to make sure all surfaces were as clean as possible. As was the case with the deck prisms, strength was not a major consideration for the sealant, since once again, a combination of frames and screws would provide the necessary strength to hold the ports in place. Something we did want was a sealant that bonded well to metal and Lexan, and could also be removed easily when we inevitably need to bed the ports again, so we chose simple, clear silicone. As we were putting everything back together, we made sure to bed the Lexan ports themselves, the bronze frames and each screw. Water getting into the wood through a screw hole might not cause any noticeable leaks in the cabin, but could become a source of rot.
After that, it was time to move on to the stanchion bases and the bow pulpit, where we followed the same basic process of removing the requisite hardware; cleaning up the deck and the stainless steel bases; taping around the area to be sealed; wiping down everything with mineral spirits to ensure good adhesion; then bedding both the bases and screws with LifeSeal.